A Complete Guide to Net Metering in India
Net metering is the billing mechanism that makes rooftop solar financially compelling for Indian households and businesses. Instead of letting surplus solar power go to waste, net metering lets you export it to the grid and earn credits that offset your future electricity bills.
Nearly 95% of rooftop solar systems in India now use net metering: and for good reason. It effectively allows the grid to act as a free battery, storing your daytime solar surplus and returning it at night.
Here is everything you need to know to get net metering approved for your rooftop solar system. This page covers the application, documents and timeline; for what net metering is and how credits work, read What Is Net Metering?.
How Net Metering Works
A bi-directional meter (also called a net meter) is installed at your premises. This meter measures:
- Units consumed from the grid
- Units exported to the grid from your solar system
At billing time, your consumption units are offset against your exported units. If you export more than you consume in a billing cycle, the surplus rolls over as credit for the next month (subject to state-specific rules on annual reconciliation and caps).
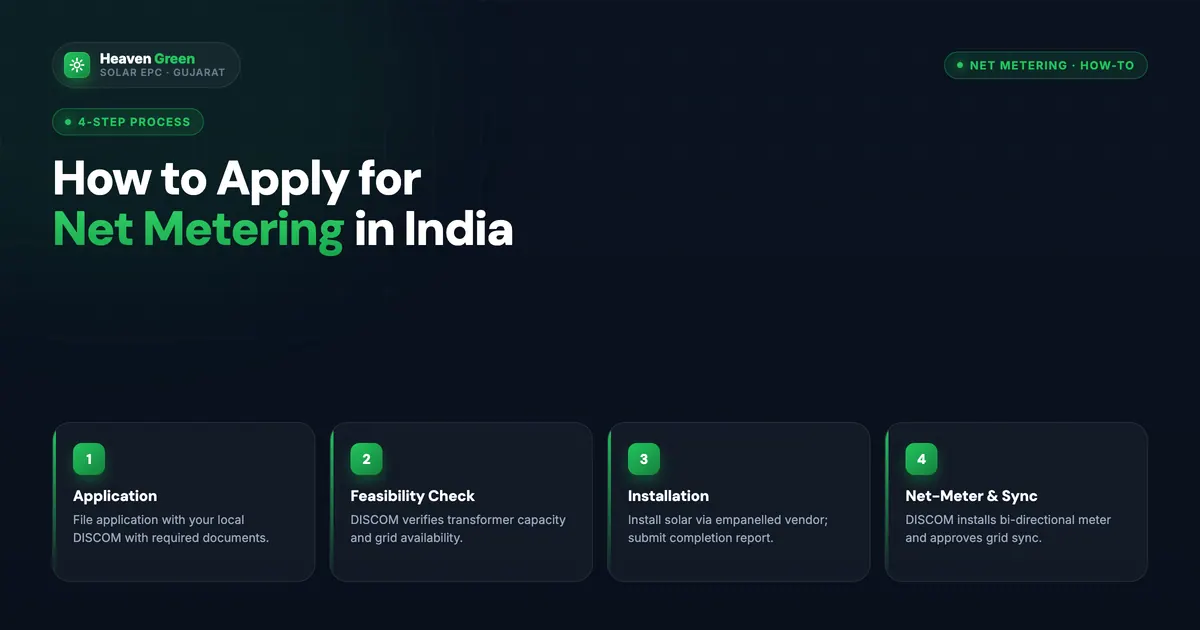
The Step-by-Step Application Process
Step 1: Apply Online
Register on the National Rooftop Solar Portal (solarrooftop.gov.in) or your state DISCOM’s portal. Provide:
- Customer account details
- Proposed system specifications (capacity, inverter type, panel brand)
- Installation address
Step 2: Feasibility Check (None Up to 10 kW)
The power utility assesses whether the local grid infrastructure can accommodate your solar system. Under the Electricity (Rights of Consumers) Rules as amended in February 2024, rooftop systems up to 10 kW are exempt from the feasibility study, and for larger systems it must be completed within 15 days (PIB). Your state regulator’s rules may add detail, so ask your DISCOM what applies to you.
Step 3: Approval and Registration (10 to 15 Days)
Upon document verification, the DISCOM issues a registration number or sanction letter approving your system for grid connection.
Step 4: System Installation
Engage a vendor registered on the PM Surya Ghar national portal (required if you want the central subsidy) to install the panels, inverter, DCDB/ACDB, earthing, and all wiring. Obtain a Commissioning Certificate confirming the system is correctly installed.
Step 5: DISCOM Inspection
The utility inspects your installation and installs the bi-directional net meter. This replaces your existing single-direction meter.
Step 6: Synchronisation and Activation
Once the net meter is installed and verified, surplus solar power exported to the grid begins earning bill credits. Your system is live.
Documents Required for Net Metering Application
Organise these before starting the process to avoid delays:
Identity and Address Proof
- Aadhaar card, PAN card, voter ID, or passport
- Recent electricity bill (as address proof)
Property Documentation
- Ownership documents or lease agreement
- No-Objection Certificate (if applicable, e.g., rented premises)
Technical Documents
- One-line electrical diagram of the proposed solar system
- Equipment specifications (panel wattage, inverter rating)
- IEC certification certificates for panels and inverter
- Your installer’s vendor registration on the PM Surya Ghar national portal (for subsidised systems)
- Commissioning certificate (after installation)
How Long Does Net Metering Take?
Regulatory timelines:
- Feasibility check: none up to 10 kW; 15 days above 10 kW (PIB, February 2024)
- Commissioning (connection agreement, meter and start-up) after your installation certificate: 15 days, cut from 30 (PIB)
Real-world timelines: Most applicants find the complete process takes 1 to 2 months (50 to 60 days) from application to meter installation. Urban areas with well-staffed DISCOMs tend to be faster; rural or smaller town DISCOMs may take longer.
The national subsidy portal processes subsidy claims in approximately 15 working days once all documents are complete.
Common Challenges and How to Handle Them
DISCOM Processing Delays
DISCOMs in smaller towns sometimes have limited staff for solar approvals. Follow up proactively at regular intervals. Keep a record of all correspondence.
Paperwork Errors or Omissions
Missing a single document can reset the clock. Prepare a complete dossier before submitting anything. A portal-registered installer should know exactly what is required in your state.
Bi-Directional Meter Supply Shortages
Some DISCOMs face meter supply issues, causing delays even after approval. Escalate through the grievance portal if the delay exceeds the regulatory timeline.
Technical Specification Mismatches
If your system specifications do not match the documents submitted, the DISCOM may reject the application. Ensure your installer submits accurate, verified specs.
Consumer Awareness Gaps
Many applicants are unfamiliar with the portal or process. A good installer handles all of this on your behalf, choose one with a proven track record on subsidy and net metering applications.
State-Specific Rules to Verify
Net metering rules vary by state. Before installation, confirm your state’s specific rules on:
- Monthly vs. annual credit settlement: some states reconcile credits annually; others monthly
- Maximum system size for net metering eligibility (often capped at 90 to 100% of sanctioned load)
- Carry-forward limits on unused export credits
- Gross vs. net metering: some states have switched to gross metering for certain categories
Since the exact steps and paperwork differ by utility, it helps to check a state-by-state DISCOM net metering breakdown alongside your DISCOM’s own rules. Your DISCOM or an experienced local installer can clarify the applicable rules for your state and category.
Tips for a Smooth Net Metering Process
- Choose a vendor registered on the PM Surya Ghar national portal who handles all subsidy and net metering paperwork as part of their service
- Organise all documents before applying: do not submit an incomplete application
- Follow up with the DISCOM at 10 to 15 day intervals after submission
- Track your application status on the national portal
- Use the grievance system if any step exceeds its regulatory timeline, DISCOMs are required to respond
- Keep copies of all documents submitted and all correspondence exchanged
Net Metering and Your Electricity Bill
Once net metering is active, your electricity bill will show:
- Units consumed from the grid during the billing period
- Units exported to the grid from your solar system
- Net units (consumed minus exported)
- Billing only on net units consumed (if positive)
- Credit carried forward if exported units exceed consumed units
Over time, well-sized solar systems with net metering can bring many months’ bills close to zero, with only fixed charges and taxes remaining. For a closer technical look at how billing credits are calculated, QBits Energy’s net metering guide breaks down the unit-by-unit math.
Get Net Metering Sorted with Heaven Green Energy
Heaven Green Energy handles the complete net metering application process for every solar system we install, from portal registration and document preparation to DISCOM follow-up and meter commissioning. We have guided hundreds of customers through the process across Gujarat.
Ready to install rooftop solar and start earning grid credits? Contact us today: +91 63904 05060
Surat: +91 63904 05060 | Ahmedabad: +91 87996 96345