A rooftop solar system is not a fit-and-forget appliance. Solar PV (photovoltaic) panels accumulate dust, bird droppings, leaf litter, and micro-shading that quietly clip 5–15% off generation within a year if left untouched. Inverter alarms log silently in the app, mounting bolts loosen through thermal cycling, and rodent damage to DC (direct current) cables shows up only when a string trips. A disciplined quarterly maintenance checklist, four short visits across the year, each lasting two to four hours on a 5 kW (kilowatt) residential rooftop, recovers most of that loss and keeps the system inside the performance band promised by the manufacturer. The work is well within the reach of any owner who can climb a roof safely, hold a multimeter, and read an app. This 2026 guide gives you the exact 10-point inspection routine our service teams use, the seasonal variations across the four Indian quarters, and the line between DIY (do-it-yourself) work and tasks that warrant a professional AMC (annual maintenance contract) visit.
The framework borrows from MNRE (Ministry of New and Renewable Energy) O&M (operations and maintenance) guidance and the BIS (Bureau of Indian Standards) safety code for low-voltage installations. We’ve trimmed it to the inspections that produce measurable kWh (kilowatt-hour) recovery, not the make-work items often padded into commercial AMC plans.
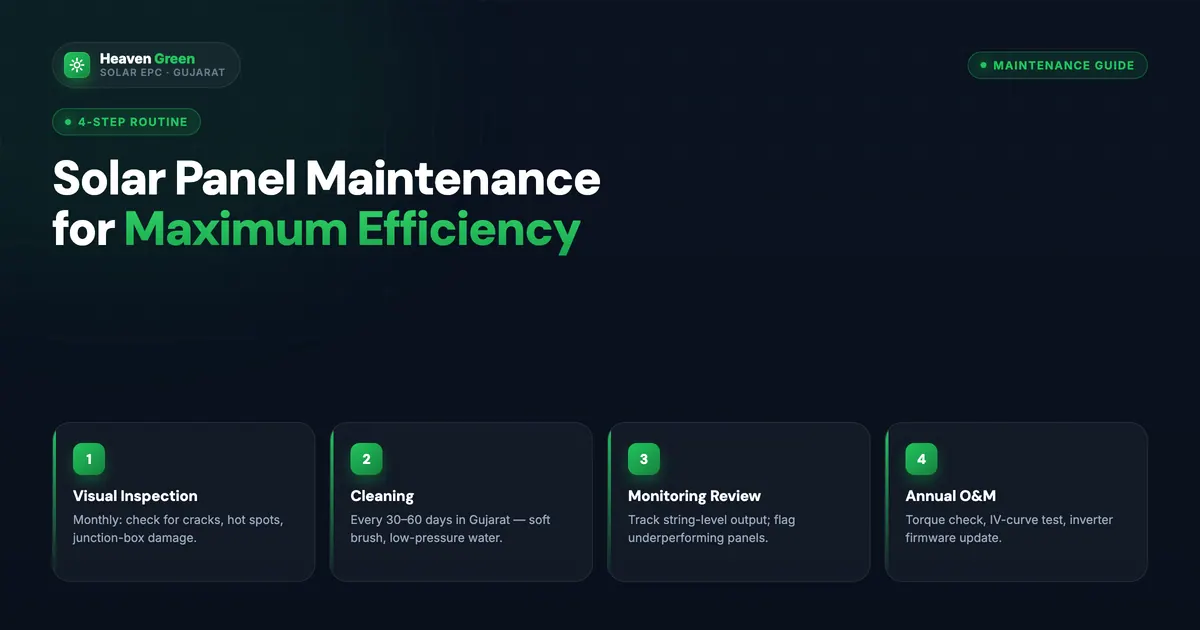
Direct answer. A quarterly solar maintenance routine has 10 points: panel surface cleaning, visual hotspot scan, debris removal, mounting bolt tightness, conduit and cable check, AC/DC isolator cycle test, MCB sequence verification, inverter app log review, generation analytics review against baseline, and bird/insect nest removal. The full cycle takes 2–4 hours per visit for a 5 kW residential system, is DIY-safe for owners with basic electrical literacy, and protects 5–15% of annual yield.
If your monthly generation has slipped below the baseline you saw in the first three months after commissioning, quarterly maintenance is the first lever to pull, before booking an expensive professional inspection or chasing warranty claims.
Why Quarterly Maintenance Matters, 5–10% Generation Recovery
Solar panels are passive devices, but the environment around them is not. Jaipur and most of north India see PM2.5 dust deposition rates of 1–2 grams per square metre per week during dry months. On a 5 kW system with ~25 square metres of glass area, that is 25–50 grams of dust per week, enough to scatter incoming irradiance and clip output by 0.3–0.7% per week if uncleaned. Add a single monsoon, leaves, mud splatter, bird droppings concentrating in the shaded edges of modules, and the cumulative soiling loss easily crosses 8% before the owner notices a change in the bill.
Mounting hardware is the second silent issue. Galvanised steel and aluminium structures expand and contract through a daily temperature swing of 25–30 °C. Over a year, that thermal cycling can loosen nuts on the module clamps and rail connectors. A clamp that has lost preload allows the panel to flex in wind gusts, fatiguing the frame and eventually cracking the back-sheet seal. Catching this at a quarterly visual check, and torquing bolts with a basic torque wrench, is a five-minute task that prevents a ₹15,000 panel replacement.
The third bucket is electrical drift. DC isolators, AC isolators, and MCBs (miniature circuit breakers) develop oxidation on contacts if they sit untouched for years. Cycling them once a quarter, switching off, waiting 30 seconds, switching on, keeps the contact surfaces clean and confirms the trip mechanism still works. This is the single most useful safety check on the system. Detailed step-by-step procedures are covered in our solar panel maintenance for maximum efficiency guide.
The 10-Point Quarterly Solar Maintenance Checklist
This is the named framework, The 10-Point Quarterly Solar Maintenance Checklist: that our field teams use across residential and small commercial sites. The ten points are sequential and intentionally ordered: cleaning before inspection (so you can see what’s underneath), visual before electrical (so you isolate faults), data review last (so you have observations to compare with the app).
| # | Inspection point | Time | DIY? | Tool |
|---|---|---|---|---|
| 1 | Panel surface cleaning | 30–45 min | Yes | Water, soft brush, squeegee |
| 2 | Visual hotspot scan | 10 min | Yes | Eyes, torch |
| 3 | Debris and bird-dropping removal | 15 min | Yes | Soft cloth, water |
| 4 | Mounting bolt tightness check | 20 min | Yes | Spanner, torque wrench |
| 5 | Conduit and cable inspection | 15 min | Yes | Torch, gloves |
| 6 | AC/DC isolator cycle test | 5 min | Yes | None |
| 7 | MCB trip sequence verification | 5 min | Yes | None |
| 8 | Inverter app log review | 10 min | Yes | Smartphone |
| 9 | Generation analytics vs baseline | 15 min | Yes | App, spreadsheet |
| 10 | Bird/insect nest removal | 10 min | Partial | Gloves, broom |
Total: 2.5–3 hours of focused work. Add 30 minutes for setup and pack-up. Now the detail.
1. Panel Surface Cleaning
Use plain water and a soft microfibre brush or squeegee. Do the cleaning in the early morning before 8 a.m. or after sunset, never on hot glass, since the thermal shock from cold water on a 60 °C module can crack the front sheet. Work in long strokes from the top of the module downwards, finishing with a squeegee pass to leave no streaks. Hard tap water in north India often leaves mineral deposits; if you see white streaks, switch to filtered or RO (reverse osmosis) reject water. Detailed technique is covered in how to clean solar panels, including the chemicals you should never touch the panels with.
2. Visual Hotspot Scan
A hotspot is a cell or group of cells running hotter than the rest of the module, usually because of localised shading, a manufacturing defect, or a cracked cell beneath the back-sheet. By eye on a clean module in mid-morning sun, a hotspot shows as a slightly darker cell or a discoloured patch. Walk along each row, look at every module, and flag anything that looks visibly different from its neighbours. Photograph it for the service record. A confirmed hotspot needs an IR (infrared) thermography scan from a professional, see point 10 of the DIY-versus-pro section below.
3. Debris and Bird-Dropping Removal
Leaves wedged at the lower edge of a module create a long shaded strip across the bottom cells. Bird droppings dry into hard crusts that resist water alone. Pick off solid debris by hand (with gloves), then soak stubborn droppings for two minutes before brushing. Pay particular attention to the lowest module on each row, debris collects there because gravity, water flow, and bird perching habits all converge.
4. Mounting Bolt Tightness Check
Every module clamp, rail joint, and L-foot bolt should be checked. A quick visual pass spots obviously loose nuts; a torque wrench set to 18–22 Nm (newton-metres) for M8 module clamps confirms preload. Don’t over-torque, crushing the aluminium frame is as bad as a loose clamp. Pay extra attention to corner clamps and the structure’s anchor to the roof; these take the highest wind load.
5. Conduit and Cable Inspection
Walk every metre of visible DC and AC cable conduit. Look for UV (ultraviolet) cracking on conduit pipes exposed to direct sun, rodent gnaw marks (especially behind the inverter and where cables enter the building), and any cable that has slipped out of its cleat and is rubbing against a sharp edge. Loose MC4 (multi-contact) connectors are a fire risk, gently tug each one to confirm it’s clipped home. If a connector pulls apart, it was never properly seated.
6. AC/DC Isolator Cycle Test
This is a 60-second job. Open the DC isolator, wait 30 seconds, close it. Open the AC isolator, wait 30 seconds, close it. The inverter will restart and reconnect to the grid, expected behaviour. The purpose is mechanical: keep the contacts wiped clean and confirm the lever travels freely. A stiff lever, a buzzing sound, or visible blackening on the switch face means a professional replacement is due.
7. MCB Trip Sequence Verification
Press the test button on the residual-current MCB (the breaker that protects against earth leakage). It should trip immediately and you should hear the click. Reset it. The trip test confirms the protection circuit is alive, without it, a fault in the inverter could put live voltage on the chassis and you’d never know. This is the single most important safety check on the system.
8. Inverter App Log Review
Open the manufacturer’s monitoring app, SolarEdge, Growatt, Sungrow, Solis, whichever is on the inverter. Pull up the event log for the last 90 days. Note any of these codes: insulation fault, residual current high, DC overvoltage, grid frequency out of range. Single events are usually harmless transient glitches; repeated events on the same code point to a real problem. Our how to monitor solar generation guide walks through the dashboards of all major Indian inverters.
9. Generation Analytics vs Baseline
Pull the last 90 days of daily kWh data from the app. Compare against the same 90-day window a year earlier (or your commissioning baseline if the system is under a year old). Allow for a 0.5–0.8% annual degradation. If output is more than 5% below the baseline after accounting for weather, you have a real issue, start with the steps in how to diagnose low solar generation.
10. Bird and Insect Nest Removal
The space between the back of the panels and the roof is a near-perfect bird nesting site, shaded, dry, and inaccessible to predators. Pigeons and sparrows in particular nest under the lower edge of the panels and droppings build up on the modules above. Look under each row with a torch. Remove nests gently (and outside the breeding season where possible) and consider installing pigeon mesh around the array perimeter if nesting is repeated. Wasp and hornet nests on the inverter housing should be removed only after sunset when activity is low.
Quarter-by-Quarter Schedule, What’s Different Each Quarter
The 10-point checklist runs every quarter, but the priorities shift with the season. North India’s calendar gives you a clean four-quarter rhythm.
| Quarter | Months | Priority focus | Time bias |
|---|---|---|---|
| Q1 | Jan–Mar | Post-winter dust, pre-monsoon prep, full clean + bolt check + connector audit | 3–4 hrs (deep clean) |
| Q2 | Apr–Jun | Summer peak heat, cleaning frequency check, inverter ventilation, hotspot scan | 2–3 hrs |
| Q3 | Jul–Sep | Monsoon recovery, debris from rain, mud splatter on lower modules, bird nests | 3 hrs |
| Q4 | Oct–Dec | Post-monsoon residue, winter prep, full clean, generation baseline reset | 2.5 hrs |
Q1 (January–March). The roof has been collecting winter haze and Diwali festival particulates for three months. This is your biggest cleaning quarter. It’s also the right time to torque every mounting bolt before pre-monsoon winds in April–May.
Q2 (April–June). Heat is the concern. Inverter heatsinks should be brushed free of dust, most inverters de-rate output above 50 °C internal temperature. Confirm the inverter’s installed position still has airflow on all sides; check whether any new construction nearby has restricted ventilation. Cleaning frequency may need to step up to weekly if your area sees Loo winds carrying heavy dust, see solar cleaning frequency in India.
Q3 (July–September). Monsoon does most of the cleaning for you, but it also drives every leaf, insect, and bird onto your roof. Expect a heavier debris and bird-nest workload. Cable conduit checks matter most this quarter, UV-cracked conduit lets water into the wiring loom.
Q4 (October–December). The post-monsoon dust film that settles in October is the stubbornest of the year because rain has cemented it into the panel surface. Plan for a thorough wet-clean. Use this quarter to reset your annual generation baseline ahead of the new year.
Tools You Need for Quarterly Maintenance
The DIY kit is short and inexpensive. Total spend ₹2,500–₹4,000 buys everything in the table below; almost all of it is reusable across the system’s 25-year life.
| Tool / consumable | Use | Approx cost | Frequency |
|---|---|---|---|
| Bucket + 10–20 L water | Cleaning | Already at home | Every quarter |
| Soft microfibre brush (telescoping) | Module washing | ₹600–₹900 | Replace yearly |
| Rubber squeegee | Streak-free finish | ₹250 | Replace 2–3 years |
| Torque wrench (5–25 Nm) | Bolt check | ₹1,200–₹1,800 | Lifetime |
| Multimeter (basic) | Voltage spot-check | ₹500–₹800 | Lifetime |
| Torch (high-lumen) | Underside inspection | ₹300–₹500 | Lifetime |
| Rubber-sole shoes + cotton gloves | Safety | ₹400–₹600 | Replace yearly |
| Smartphone with inverter app | Monitoring | Already owned | , |
A pressure washer is conspicuous by its absence. Do not use one. Pressure beyond 1 bar can defeat the panel frame’s edge seal, drive water into the junction box, and void the warranty. Soft brush and squeegee with gentle water flow is the recommended technique across IEC 62548 (the international PV array installation standard) and IS 14286 (the Indian Standard for crystalline silicon terrestrial PV modules).
Two optional tools earn their keep on larger systems. A telescoping pole that lets the brush reach the upper rows from a single safe standing position saves you from walking on the modules, module walking is the leading cause of micro-cracks in residential rooftops. A simple ₹400 angle finder helps you confirm that the tilt of every panel still matches the design value; over years, a loosened structure can sag by 2–3 degrees, costing 1–2% of annual yield. Neither tool is mandatory, but both pay for themselves inside a year on a 5 kW system.
Store the kit in a sealed plastic crate on the roof access landing, not in a basement two flights away. Maintenance happens when the tools are within arm’s reach; otherwise the quarter slides by and the next visit becomes a half-year visit.
Ready to skip the DIY routine? Our quarterly AMC plans cover all 10 points with documented service records, annual IR thermography, and same-day response on alarms. Get a free quote →
DIY Quarterly vs Professional AMC
DIY quarterly maintenance handles 8 of the 10 checklist points well. The remaining two, IR thermography and a formal earth-resistance test, require instruments that cost more than four years of AMC fees. The table below shows the practical division.
| Task | DIY-friendly | Professional-only | Why |
|---|---|---|---|
| Surface cleaning | Yes | , | Water + brush, no instruments needed |
| Visual hotspot scan | Yes | , | Eyes confirm visible damage |
| IR thermography | , | Yes | Requires ₹40,000+ thermal camera |
| Debris and nest removal | Yes | , | Manual work |
| Bolt tightness | Yes | , | Torque wrench is cheap |
| Cable and conduit inspection | Visual yes | Insulation test no | Megger test needs trained hand |
| Isolator cycle test | Yes | , | One-minute mechanical check |
| MCB trip test | Yes | , | Test button is built in |
| Inverter app log | Yes | , | Free with the app |
| Earth resistance test | , | Yes | Earth tester instrument; safety-critical |
| Warranty claim filing | , | Yes | Needs technician sign-off |
| Generation analytics | Yes | , | App and spreadsheet |
Our internal data across 600+ quarterly visits in 2024–25 shows that roughly 1 in 8 quarterly DIY checks (~12%) escalates to a professional call, usually because the owner spotted a hotspot, an MCB that won’t reset, or an inverter alarm code they didn’t recognise. The rest stay fully self-served. For a deeper cost comparison see solar AMC cost.
The pricing logic for the two missing professional tasks is informative. A handheld IR camera with the resolution to identify cell-level hotspots starts at ₹38,000 for a basic FLIR or HikMicro unit, and rises to ₹1.2 lakh for the higher-resolution scientific models that catch finer defects. A four-terminal earth tester costs ₹6,500–₹12,000. Combined, these two instruments would consume four to six years of an AMC fee, and they sit idle for 363 days a year. The economics of renting them annually through a contracted technician are unbeatable for any single homeowner.
Safety Protocols During Quarterly Maintenance
Safety on a solar rooftop is non-negotiable. The system runs at 600–1,000 V DC during the day, enough to kill, and the roof itself is a height hazard. Apply these rules every single visit.
Warning, high voltage
Never open a DC connector while the panels are in sunlight, the open arc can ignite. Always switch the DC isolator OFF first, wait two minutes, then disconnect. Never stand on a wet panel. Never wear metal jewellery, watches, or a metal belt buckle on the roof. Always use rubber-sole shoes and stay outside the drip-line of cables carrying live voltage.
Five non-negotiable rules:
- Time of day. Do cleaning and inspection before 9 a.m. or after 5 p.m. when modules are cool and irradiance is low. The risk of arc flash on a damaged connector falls sharply at low irradiance.
- Two-person rule for roof work. One on the roof, one at ground level with a phone and the emergency number. Lone roof work is a documented cause of fatality.
- Anchor before you walk. A 25-metre fall-arrest harness clipped to a roof anchor costs ₹2,500 and is worth more than every other tool on the list combined.
- Dry hands, dry feet. Water on the panel is fine, water on you while you touch a connector is not.
- Never improvise. If a fault scares you, stop. Switch the AC isolator off at the meter, call a professional, and walk away. There is no maintenance task worth a hospital visit.
Tip, record everything. Photograph each quarterly visit. Save the inverter app’s monthly generation chart. A 12-month visual record makes warranty claims trivial and helps a professional diagnose drift in five minutes instead of an hour.
What to Do If Generation Has Dropped
If point 9 of the checklist shows generation more than 5% below baseline after weather normalisation, work through this sequence before calling a professional.
First, repeat the surface clean. A genuinely soiled panel can account for 5–8% by itself. Second, check the inverter dashboard for any string showing materially lower current than its peers, a single failed string halves your output until the inverter rebalances. Third, look for new shading: a neighbour’s water tank, a tree that grew, a satellite dish someone installed. Fourth, review the app log for repeated insulation or DC voltage faults that suggest a cable or junction box issue.
If after these four steps the drop persists, escalate to a professional IR scan. The thermal camera will identify the failing module within ten minutes and feed straight into the manufacturer’s warranty process. Our diagnostic playbook walks through every common drop cause in how to diagnose low solar generation.
Two scenarios deserve special mention. First, if the drop appears suddenly, say, output halves on a single day with no change in weather, you almost certainly have a string-level fault: a tripped breaker, a failed fuse in the inverter, or a disconnected DC connector. The fix is usually a 15-minute job for a technician and the system is back to baseline by the same evening. Second, if the drop is gradual over several months despite clean panels, the cause is more likely module-level: power degradation beyond the 0.5–0.8% annual envelope is a warranty event, and the manufacturer must honour the linear-power-warranty curve printed in the original module datasheet.
Document everything with timestamps and photographs. A warranty claim filed with twelve months of generation data and a dated IR image clears in 30–60 days. The same claim filed without supporting data can stall for six months or be rejected outright.
Common Quarterly Maintenance Mistakes
Six mistakes we see repeated across DIY sites, every one of them avoidable. The pattern is consistent: each mistake either damages the panel, masks a real issue, or creates a new safety hazard. None of the six requires expensive equipment to avoid, only attention.
-
1
Using a pressure washer. The high-pressure jet defeats the frame seal and pushes water into the junction box. The damage is invisible from the top and shows up months later as an insulation fault. Soft brush only.
-
2
Cleaning with detergent or vinegar. Harsh chemicals strip the anti-reflective coating on the front glass. Plain water (filtered if hard) is enough; for heavy droppings use a soft cloth and a longer soak.
-
3
Skipping the app log. Half the value of the inverter is its diagnostic memory. Reviewing the 90-day fault log takes ten minutes and surfaces problems the eye cannot see.
-
4
Cleaning at noon on a hot day. Cold water on 60 °C glass triggers thermal shock and micro-cracks. Early morning or post-sunset only.
-
5
Over-torquing module clamps. A stripped aluminium frame is a dead module. Torque wrench to 18–22 Nm, no more, no less.
-
6
Ignoring bird nests until monsoon. A nest in March is a colony by July. Address it the quarter you find it.
Across our 2024–25 service log, mistake #1 (pressure washer) accounted for 23% of out-of-warranty insulation faults, by far the costliest error a DIY owner can make on a panel that would otherwise survive 25 years. Mistake #3 (skipping the app log) is the slowest-burn error: an inverter alarm logged silently for six months becomes a string failure that costs ₹8,000–₹15,000 to recover. Treat the app review as the single most valuable ten minutes of the quarterly visit.
DIY Quarterly vs Hiring an AMC (Pros and Cons)
For roughly half our residential customers, DIY quarterly maintenance is the right answer. For the other half, an AMC makes more sense. The split tracks with three variables: roof access difficulty, time availability, and warranty complexity.
- + Zero recurring cost beyond ₹3,000 of tools
- + Owner learns the system intimately
- + Issues caught early, between scheduled visits
- + Flexible timing around your schedule
- + Honest data on your system's behaviour
- − Roof work has real safety risk
- − No IR camera or earth tester at home
- − Warranty claims need technician sign-off
- − No documented service log for resale
- − 8–10 hours of owner time per year
Verdict. DIY quarterly is the right call for owners of 1–5 kW residential systems with easy roof access and basic electrical literacy. Move to a paid AMC if your roof needs scaffolding, your system is above 10 kW (commercial or large residential), or your inverter is still inside the manufacturer’s warranty window, the documented service log keeps the warranty enforceable. A hybrid, DIY for cleaning and visual checks, paid AMC visit once a year for IR and earth tests, is what we recommend for most residential customers above 5 kW.
For a full breakdown of what a paid contract covers, read what’s included in solar AMC.
There is also a hidden financial argument for the AMC route. Property valuers and prospective buyers consistently mark down second-hand solar systems that lack a documented service history. A 5 kW system with a quarterly AMC service log spanning five years adds ₹40,000–₹60,000 to resale value over an identical system with no records, because the next owner can be confident the panels still perform to spec. The AMC fees paid over that period are far less than the value added.
How Heaven Green Energy Does Quarterly Checks
Heaven Green Energy runs quarterly maintenance contracts across Rajasthan and the wider north Indian belt, Jaipur, Sikar, Alwar, Bharatpur, Kotputli-Behror, and beyond. Our quarterly AMC includes the full 10-point checklist plus annual IR thermography and remote monitoring on the MNRE PM Suryaghar portal:
- Four scheduled site visits per year: every 90 days, with a written service report signed by the site engineer and counter-signed by the owner.
- Annual IR thermography scan: high-resolution thermal imaging of every module to catch cell-level defects before they propagate.
- Earth resistance test: yearly megger test per IS 3043 (the Indian Standard for earthing), with the value logged against the commissioning baseline.
- Monthly remote monitoring: our team reviews your inverter app data once a month and flags anomalies before you see a bill change.
- Same-day response on alarms: any critical fault code triggers a technician dispatch the same day in Jaipur city, next working day across rural districts.
- Warranty management: we file panel and inverter warranty claims on your behalf with the original manufacturer.
Explore the services that match your project:
- Residential Solar: 1–10 kW rooftop systems with built-in quarterly AMC for the first year.
- Commercial Solar: 10–500 kWp installations with monthly performance reviews and quarterly site visits.
- Contact Heaven Green Energy: get a quarterly AMC quote tailored to your system size and location.
Every quarterly report we issue carries the BIS-aligned inspection items, the IS 14286 cleaning protocol confirmation, the IEC 62548 isolator verification, and the IS 3043 earth-resistance log. We file the reports through a secure customer portal so you can pull any quarter’s record on demand, useful for warranty correspondence, property sale, and your own peace of mind that the asset is performing as designed.
Frequently Asked Questions
How often should I do solar maintenance on a residential rooftop?
A quarterly schedule, four visits a year, is the right cadence for almost every residential rooftop in India. Cleaning frequency may need to step up to monthly or even weekly during heavy dust season (March–June in north India, or near construction sites), but the full 10-point inspection is needed only once every 90 days. Sites near coastlines, industrial areas, or dense tree cover sometimes need a bi-monthly inspection; everyone else is well served by quarterly. The 90-day cycle aligns with how dust, mounting bolts, and electrical contacts actually drift.
Is DIY quarterly solar maintenance safe for the average homeowner?
Yes, with three caveats. First, you must be physically comfortable on a roof, if heights make you nervous, hire someone. Second, you must follow the basic electrical safety rules: never open DC connectors under load, always cycle the isolator off first, never wear metal jewellery. Third, you should not attempt insulation resistance tests, earth tests, or IR thermography without training. Those are professional jobs. The other eight points of the checklist, cleaning, visual inspection, bolt check, isolator cycle, MCB test, app review, analytics, nest removal, are well within reach of any owner with basic literacy in electricity.
Can I use a pressure washer or detergent to clean solar panels?
No. Pressure washers above 1 bar can defeat the panel’s frame edge seal and push water into the junction box, voiding the warranty and causing insulation faults months later. Detergents, vinegar, and citrus cleaners attack the anti-reflective coating on the front glass, permanently reducing transmission and therefore generation. Plain water, filtered or RO-reject for hard-water areas, with a soft microfibre brush is the only method approved by panel manufacturers and the IS 14286 standard. The full cleaning protocol is in our how to clean solar panels guide.
What is the biggest risk of skipping quarterly maintenance?
Cumulative soiling loss. A solar array left uncleaned for a full year can lose 8–15% of its yield, which on a 5 kW residential system in Rajasthan is 600–1,100 kWh of generation per year, worth ₹4,200–₹7,700 at current retail tariffs. That’s more than the cost of an entire year of AMC. The second biggest risk is undetected micro-damage, a hotspot or loose connector, that escalates into a panel replacement or an electrical fault if not caught early at a quarterly visual check.
When should I call a professional instead of doing the check myself?
Three triggers. First, if any inverter fault code repeats more than twice in a 30-day window. Second, if your generation has dropped more than 5% from the baseline after you’ve cleaned the panels. Third, if you find a visible hotspot, a cracked module, or a connector with burn marks. A professional IR thermography scan costs ₹3,000–₹5,000 and is the fastest way to confirm a module-level fault. Warranty claims also need a professional sign-off, the manufacturer will reject an owner-filed claim without a certified technician’s report.
How much does a professional quarterly AMC cost in 2026?
Quarterly AMC pricing for residential rooftops sits in the ₹2,500–₹4,500 per quarter range for a 3–5 kW system, or ₹10,000–₹18,000 per year. Commercial sites above 10 kWp typically pay ₹800–₹1,200 per kWp annually, billed quarterly. The fee usually includes four site visits, one annual IR scan, one earth resistance test, monthly remote monitoring, and unlimited alarm responses. Detailed breakdowns by system size and city are in our solar AMC cost guide.
Do I need to maintain solar panels during the monsoon?
Yes, but the focus shifts. Rain handles most of the cleaning for you, so the cleaning step is shorter. The bigger jobs in monsoon are removing leaves and mud splatter from the lower modules, clearing bird and insect nests that build up under the array, and inspecting cable conduit for UV cracking after the wet season. Q3 (July–September) is also the right quarter to check the inverter’s ventilation, monsoon humidity combined with dust forms a sticky film inside heatsink fins and de-rates the inverter.
What records should I keep from each quarterly visit?
Five items: a date-stamped photograph of each row of panels (before and after cleaning), a screenshot of the inverter app’s 90-day fault log, a screenshot of the monthly generation chart, a one-line note on any bolts retorqued or connectors reseated, and a flag on any anomaly that did not resolve. Store everything in a folder per quarter. A 25-year system will generate 100 quarterly records, a small price for a complete audit trail when you file a warranty claim or sell the property.